
Understanding Test Automation Frameworks
Hi, my name is Ryan Dudley and I’ve been working with nFocus now for nearly 8 years, starting my journey as an apprentice. Now I class myself as a budding Technical Tester, which is not an easy role. My day-to-day tasks at the moment consist primarily of manual testing, but at any given opportunity I like to be able to do automation. As there was no capacity for me to do this on my current project, I decided to do something within my own time and challenge myself to do something which I had not done before which was choosing a test automation framework and starting from scratch.

I learnt how to set up and organise a framework to make it manageable. This enabled me to tackle various problems. In this piece of automation testing, I wanted to automate a golf booking application for my local golf club (to beat the booking queues!)
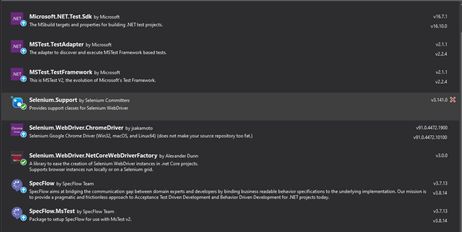
Firstly, I want to start off with my explanation of why I have chosen the following tools - Visual Studio/Selenium/SpecFlow. I thought using these tools would be good as in a likely scenario, Visual Studio would match a clients' software stack. Selenium would enable me to drive my tests within the browser and SpecFlow to show a client the readable steps without the need to understand code.
Each step allows a simple sentence to explain what is happening within the code. Started off using Visual Studio, creating a new project and selecting a relevant template for my needs. Once this was done, I had a shell to work from and to start adding to. I began by adding some NuGet packages to the project which I would need to run my automation tests within the browser.
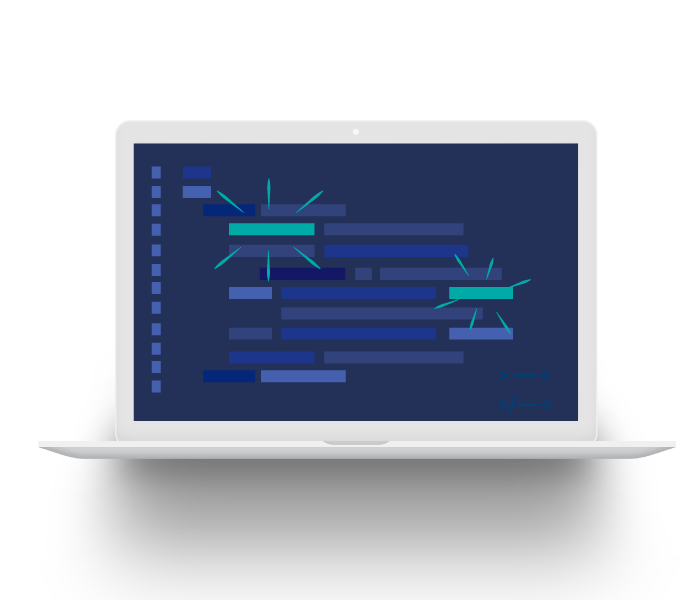
My next task was to create a series of folders, leading to creating a folder hierarchy to allow for some organisation. Below are a few of the examples:
1. Features – This is where I can store all of my ‘feature files’, using the ‘Gherkin language' to drive my tests. You can look at a BDD as a bridge between the requirements and the automated test.
2. Helpers – To store my ‘helper methods’ which will hold classes to perform specific tasks.
3. Hooks – Steps which need to be run in every test e.g., a setup and closing down step.
4. Models – To store my ‘Page Object Models’ queries which allow me to interact with objects on the browser.
5. Steps – To add the link from the BDD to code. For each step within the feature file, there will be a corresponding step definition within one of the steps classes.
With these folders created, I then set myself a list of jobs for my first automated test, making sure that I could book a tee time for a certain time and date. To achieve this, I split my work into sections. It started off quite well as the login page and the basic navigation did not pose much of a challenge as the objects which needed mapping were straightforward.
Then, when I had prepped my test data and outlined my SpecFlow steps, I was able to automate a solution for logging into the application. I was then able to build on this to navigate myself into the booking form which then posed more of a challenge. This was due to the complexities of the queries for the page objects as none of them had a straightforward way of locating them. Unfortunately, this was not the most robust solution as I was not able to keep my XPath queries as simple as I would have liked. Next, I encountered my biggest problem on the automation journey when attempting to change the month value within a date picker.
This meant that the automation test would just fall over even when my query would bring back 1 of 1 result each time. I tried googling and researching the issue at hand, but I could not come up with the solution! This is where I was lucky enough to enlist the help from a Senior Automation Engineer at nFocus who, with some investigation, was able to come up with the solution as to why the test was falling over.
The issue was quite a simple one and was an easier fix that I expected. By default, my automation GetElement method, ‘WaitEvent.ToBeClickable’ was not able to click, so it waited until it hit 30 seconds and then timed out, failing the automation test. Changing the wait event on the query as an additional parameter to ‘WaitEvent.NoWait’.
This allowed the automation test not to wait for it to become clickable and just selected the correct value. With this issue being resolved, I was able to continue with the test at hand. With the automation test navigating to the correct date, I needed to book the tee time. Using my test data set up within my feature file, I was able to tell the test to look within the page to see if that time was available. If it was, then to click “Book now”. Upon clicking on the booking, I would check that the correct booking page had been opened. This then allowed me to add my selected users to the booking.
With this test in place, my goal was completed as I was able to book tee times at my local club stripping away the manual effort. In the future, all I needed to do was change the test data and everything would be done for me.

.png)